Advertisement

Learn best practices for auditing AI systems to meet transparency standards and stay compliant with regulations.
How to run ComfyUI workflows for free using Gradio on Hugging Face Spaces. Follow a step-by-step guide to set up, customize, and share AI models with no local installation or cost

How the Artificial Analysis LLM Performance Leaderboard brings transparent benchmarking of open-source language models to Hugging Face, offering reliable evaluations and insights for developers and researchers
Learn the regulatory impact of Google and Meta antitrust lawsuits and what it means for the future of tech and innovation.
Learn everything about mastering LeNet, from architectural insights to practical implementation. Understand its structure, training methods, and why it still matters today

Discover Midjourney V7’s latest updates, including video creation tools, faster image generation, and improved prompt accuracy
How the NumPy argmax() function works, when to use it, and how it helps you locate maximum values efficiently in any NumPy array
How the Open Chain of Thought Leaderboard is changing the way we measure reasoning in AI by focusing on step-by-step logic instead of final answers alone
ChatGPT in customer service can provide biased information, misinterpret questions, raise security issues, or give wrong answers

CyberSecEval 2 is a robust cybersecurity evaluation framework that measures both the risks and capabilities of large language models across real-world tasks, from threat detection to secure code generation

How the Open Medical-LLM Leaderboard ranks and evaluates AI models, offering a clear benchmark for accuracy and safety in healthcare applications
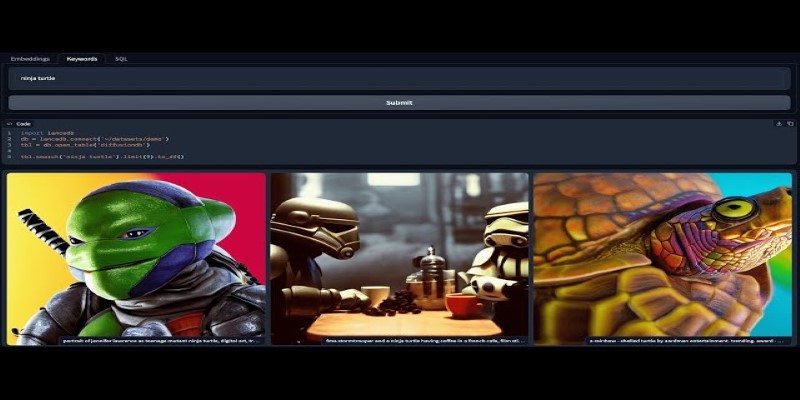
Learn how to build a multi-modal search app that understands both text and images using Chroma and the CLIP model. A step-by-step guide to embedding, querying, and interface setup
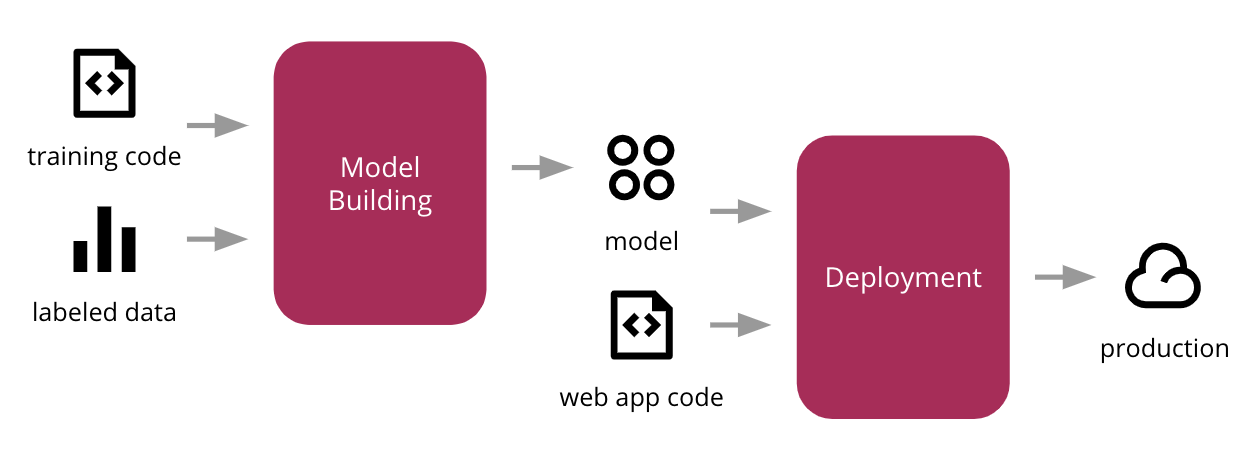
Creating a machine learning app is one thing, but getting it to run smoothly across different platforms is a whole other task. Most developers struggle not with the model itself, but with the setup around it—UI, containers, and cloud services. That’s where Streamlit, Docker, and GKE come in. Together, they help turn your code into a usable app that others can access, test, and rely on. In this guide, you’ll learn how to move from a working ML script to a full app that runs on Google Cloud.
Most ML scripts are fine in notebooks or command lines, but if you want others to interact with them, you need a proper interface. Streamlit is lightweight, easy to set up, and doesn’t ask for much. If you can write a few Python functions, you’re good to go.
Make sure Python is installed, then create a virtual environment and install Streamlit.
bash
CopyEdit
pip install streamlit
Create a new file, say app.py, and write a small app:
python
CopyEdit
import streamlit as st
import joblib
model = joblib.load('model.pkl')
st.title("Prediction App")
user_input = st.number_input("Enter a value")
if st.button("Predict"):
result = model.predict([[user_input]])
st.write(f"Prediction: {result[0]}")
Place your trained model (model.pkl) in the same folder. Run the app:
bash
CopyEdit
streamlit run app.py
That’s your basic app. Clean layout, no fluff, and fully functional.
Running the app locally is fine, but you want it to work the same way for everyone. That’s what Docker is for. It gives you a consistent environment, no matter the machine.
Here’s a simple one:
# Use an official Python runtime as a base image
FROM python:3.10-slim
# Set environment variables
ENV MODEL_PATH=/app/model.pkl
# Set working directory
WORKDIR /app
# Copy current directory contents into the container
COPY . /app
# Install dependencies
RUN pip install --no-cache-dir streamlit joblib
# Expose the port Streamlit runs on
EXPOSE 8501
# Run the app
CMD ["streamlit", "run", "app.py"]
bash
CopyEdit
docker build -t ml-app .
docker run -p 8501:8501 ml-app
Now, your app runs in a container. Open your browser and go to http://localhost:8501 to confirm everything’s working.
When running the app locally, you can load your model from a .pkl file sitting right next to your script. But things change once you move to containers and the cloud. It's better to keep model files in a consistent path and avoid hardcoding anything. You can use environment variables to set paths or API keys, then pass them into the container. In Docker, it looks like this:
dockerfile
CopyEdit
ENV MODEL_PATH=/app/model.pkl
And in your code:
python
CopyEdit
import os
model_path = os.getenv("MODEL_PATH", "model.pkl")
model = joblib.load(model_path)
On GKE, you can add these variables to your deployment file under 'env'. If your model is big or updates often, store it in a Google Cloud Storage bucket and download it when the container starts.
Streamlit apps don't need heavy images. If your container is large, your builds will be slow, and deployments will take longer. To fix this, you can start by switching to a smaller base image like python:3.10-alpine. Also, remove anything that's not needed—no test files, no unused assets.
Multi-stage builds are also worth looking into. You can install and compile everything in one stage, then copy only the final build into a slim image. This keeps your image clean and lean, which makes a difference when deploying multiple versions or running updates.
The next step is moving the Docker image to the cloud. Google Container Registry (GCR) lets you store your Docker images so they can be used on GKE.
First, authenticate:
bash
CopyEdit
gcloud auth login
gcloud config set project [PROJECT_ID]
gcloud auth configure-docker
Then tag your image:
bash
CopyEdit
docker tag ml-app gcr.io/[PROJECT_ID]/ml-app
And push it:
bash
CopyEdit
docker push gcr.io/[PROJECT_ID]/ml-app
Now the image is in GCR, ready for Kubernetes to use.
Now it’s time to get your app running on Google Kubernetes Engine (GKE). This makes it scalable and accessible from anywhere.
bash
CopyEdit
gcloud container clusters create ml-cluster --num-nodes=1
gcloud container clusters get-credentials ml-cluster
Create a file called deployment.yaml:
yaml
Copy
Edit
apiVersion: apps/v1
kind: Deployment
metadata:
name: ml-app-deployment
spec:
replicas: 1
selector:
matchLabels:
app: ml-app
template:
metadata:
labels:
app: ml-app
spec:
containers:
- name: ml-app
image: gcr.io/[PROJECT_ID]/ml-app
ports:
- containerPort: 8501
env:
- name: MODEL_PATH
value: "/app/model.pkl"
And one for the service.yaml:
yaml
Copy
Edit
apiVersion: v1
kind: Service
metadata:
name: ml-app-service
spec:
type: LoadBalancer
selector:
app: ml-app
ports:
- protocol: TCP
port: 80
targetPort: 8501
To apply these:
bash
Copy
Edit
kubectl apply -f deployment.yaml
kubectl apply -f service.yaml
Once your app is live, don’t just leave it running and hope for the best. GKE supports built-in logging and monitoring through Google Cloud’s operations suite. All logs from your app—print statements, errors, usage—can show up in the Cloud Logging dashboard.
You can also track memory, CPU usage, and request count. If your app crashes or becomes slow, this is where you’ll catch it. Just make sure your app writes to standard output, and Google Cloud will handle the rest. No need to add fancy logging tools if all you need is visibility into what’s happening.
Putting together Streamlit, Docker, and GKE can look like a long road, but each step has a purpose. Streamlit builds your UI without getting in the way. Docker wraps it all in a clean box. GKE scales it so anyone can use it. Together, they help turn your ML script into a shareable tool that doesn’t break when it leaves your laptop.